Sunday, December 6, 2015

Reaching my goals for 2015

As of this evening, I achieved my original Christmas customer quilt goals. There was a little cheating going on. One customer quilt was too big for the backing fabric, and can't go on until I find 1/3 yard more of the backing fabric. It wasn't a crucial piece to have done by Christmas according to the customer. The other part of the cheating is, I'm working on pieces that were dropped off this past week.....and you guessed right.....please have them finished before Christmas. This is not a complaint, just a comment on, "best laid plans".

In the longarm quilting home business, if you aren't behind, you are out of work. This is one of the times of the year when I will work very long hours to stay on top the jobs.
The photo is of my quilt Stellar Cool made a few years ago. It is a favorite and hangs in my home.

Thursday, December 3, 2015

Almost missed a chance....

There are times when facebook is my friend. I saw a post by a fb friend that he had made the deadline for entering his quilt in the AQS Paducah show. I've gotten so wrapped up in the promise of finishing my customer quilts in a timely manner before Christmas and totally forgot about the deadlines coming up. I'm really bad about that. So tonight after dinner, my focus will be on getting my entry sent.

The picture attached to this post is NOT a picture of my entry, but it is a blast from the past. It is a close up of a small trapunto class sample for a class that I taught years ago. I colored it with Inktense pencils and added beads, and little x's.

Wednesday, December 2, 2015

It's a Black and White Challenge


The new 2016 Black and White challenge notices for Art Beat gallery have come out.

Time to put on my thinking cap and sketch out a couple of ideas. Deadline is February.

Tuesday, December 1, 2015

8 Quilts Away from.......

As of this morning I'm 8 quilts away from.....

1. Finishing customer quilts before Christmas.
2. Being able to work on a very large pile of Quilts of Valor for local veterans.
3. Being able to work on my unquilted tops.
4. Finish a show quilt ufo.
5. Plan my next show quilt.
6. Work on a book query.

As I get older my art fulfills me. It feeds my body and soul. It helps to keep me warm in the winter physically and spiritually. It brings joy to my family, and builds a legacy.

A Fire Under My @$%

Today is the first day of a better blogging behavior for me. I'm accepting the 31 day blogging challenge by Cheryl Sleboda. I plan to post each day for 31 days and hopefully, it will help me get in the habit of sharing more for you.

http://muppin.com/wordpress/index.php/the-31-day-blog-writing-challenge/

So lets get on our blogging hat.


Friday, October 2, 2015

Macro Leaf Part 3


Macro Leaf is finished and I'm very pleased with it. It has been beaded with dull copper seed beads, crystals, and flat glass beads. I've added silk worm cocoon caps that are painted with a lumiere bright copper paint, and shiny copper thread covered shisha mirrors. The faux ivory thing just looked like it belonged. The quilt is attached to a dark brown painted canvas, ready to hang. This piece is going to be on display and for sale at Art market 63 outside of Cable WI.

Wednesday, September 23, 2015

Act ll of the Macro Leaf

My next step in making this little art quilt was hand painting the little pebbles to reflect a fall leaf color on the surface of the leaf. I used Seta color and Lumiere metallics specifically made for painting on fabric. I achieved the look I was after. Tiny orange crystals were fused in the few pebbles I did not color. Next will be beading and then I can fuse the turned edge down for a clean edge. I'm still liking the idea of the resin faux ivory piece along the bottom of the leaf vein. When this is finished it will be mounted on a 16x20 painted canvas.

A Little Time on My Hands

I had a little extra time on my hands yesterday in the afternoon. My morning was filled with giving tips, tricks, and some longarm lessons to a friend. With that little bit of extra time, I decided to work on a macro leaf project. I pressed a brown piece of hand Cherrywood dyed fabric and some fancy poly/nylon fabrics. After chalking a spine on my fabric, I trimmed some of the poly/nylons into thin strips and placed them on the marked areas. I layered some of the dress fancies, stitching as I went with the longarm. After I felt there was enough surface fabric, I switched threads to a warm orange and pebbled parts of the brown. I switched thread out again to a darker brown for areas to mctavish.

After trimming, I pulled out some fabric paints to paint the pebbles to get a fall leaf effect. As you can see, I'm midway on this project. I plan to hand paint all of the pebbles and then add surface embellishments using a piece of faux ivory, copper colored beads of varied sizes, and then a few fall colored crystals.

To finish the edge, I will probably turn the outer edge under for a blind hem.

My intent is to mount this on a painted canvas.

Friday, September 18, 2015

Altering Hand Dyes

After having a slightly busy day and not able to get a quilt on the longarm, I decided to spent a couple of hours playing and prepping fabric for future projects.

I dug through my huge stack of hand dyed fabrics that I've made, for pieces to over dye using Tumble Dye which is a spray-able heat set dye. After a short trip to my back yard to find some large leaves with good veining and selecting an assortment of fat quarter fabrics, I pressed my fabrics. Laying the fabrics on a sheet of plastic and placing the leaves vein side up, I sprayed the outer edge around the leaves and spritzed the veins so the dye puddled a little. Then I flipped the leaf over onto the unsprayed leaf spot and pressed the leaf into the fabric with my hand, being certain to press all of the puddled dye into the fabric. This makes the veining prominent.  I then pressed the dyed piece without steam to heat set the dye.

Ingredients to replicate what I've done:

Hand dyed fat quarters in assorted colors.
Tumble dye
Leaves with prominent veins or fake plastic ferns.
Old towel to place under dyed pieces while ironing.
Iron and iron board.
Paper towels to sop up over spray.
Plastic for work area.
Rubber gloves


I've used this method many times and it creates a very cool shadow effect that I love for my art pieces. I hope you have fun.

Wednesday, July 29, 2015

Irena Bluhm Guest of Hayward Piecemakers Quilt Guild


Tonight the Hayward Piecemakers had the pleasure of hosting Irena Bluhm for a trunk show at the Hayward Wesleyan Church. What an amazing quilter! Talented, courageous, and fearless. And the biggest thing is she is self taught. She had an idea and ran with it. I admire her greatly. Tomorrow she teaches two classes on her coloring techniques. Lots of fun and lots of creativity. 

Thursday, July 23, 2015

Big Birches In Hayward

The two quilted panels for the permanent exhibit for the Weiss Library in Hayward is totally finished. They will be hanging at the Piecemakers Quilt Show this weekend before being dedicated and hung at the library. The quilt show is held at the Wesleyan Church 10655 Nyman Ave, Hayward, WI 54843. Show hours are July 24th and 25th 10-4 both days.

The journey for this quilt was fun, and I enjoyed working on it with quilting friends that were excited about the project. Thank you Leslie, Jean and Deb.

Come see us at the show.

Thursday, July 16, 2015

Stamp Carving


Today's meeting with the Wild Threads Machine Quilting Group was fun and laid back. We had a small group today with the busy summer many had to miss the meeting. Those that made it go to carve stamps using lino cutters and safety cut rubber. The first picture is of stamps I've carved in the past and a few small ones I cut today. I'm loving the little mouse and bunny. They would be perfect for label making for my art quilts.

Wednesday, July 8, 2015

Wild Threads Challenge 2015

Here is my teaser for the Wild Threads Macro Leaf Challenge 2015.

The leaf printed on paper is from a leaf my guy gave me last year in the fall. Quirky but appreciated gift.

The pile of fabrics are synthetics that I bought this past winter from a friend, and the larger hand dyed fabric is from one of my winter snow dye batches using orange and pale blue dyes.

That's all you get until after I start stitching and layering.

Thursday, June 18, 2015

Little Birches

Little Birches is finished and ready for the Hayward Quilt Show auction the end of July. The binding is perfect, and the trees really have a 3-d effect. I've added some crystals in the sky. They represent fire flies to me, but could also be stars in the night sky.


Wednesday, June 17, 2015

One Step Closer


The mini birch wall hanging is almost finished. It's quilted, the hanging dowel is covered with the same fabric as the back and the label will be fused on. I plan to add a few diamond crystals to replicate fire flies. 

The larger version is on the machine for quilting. The quilting will be knocking the black background down and some stitch in the ditch for the birches with swirled knots in some of the patches.

The mini is for the Hayward Piecemakers small quilt auction, and the larger for a permanent exhibit in the local library. However, I have a goal of having it finished in time for the end of July quilt show, so it can be displayed.

Sunday, June 14, 2015

MN Quilt Show Zen


Nothing warms the heart of a fiber addict more than a quilt show shopping spree. I paid my respects to the Minnesota Quilt Show this past weekend and came away feeling very satisfied. The vendor numbers seemed a bit light and the 3 arena's not as full as I remembered it from past shows there, but it did the job. 

I'm totally in love with the Wicked exhibit hosted by Cherrywood Fabrics. And, the Northern Lights Machine Quilters exhibit in the lobby was impressive. 

On average I could make it down an isle 5 or 10 feet and I had a friend to chat with. That is part of the shows I love. Being able to connect with like minded addicts, networking, being inspired by the riot of color and texture puts me in a perfect Zen.

Shows are always too far apart, but in the meantime, I'll console myself with the treasures that came home with me and put in a bit of sewing time.


Friday, May 29, 2015

Library Project Phase 2

The top panel will be hung on the left and the bottom on the right for a 10 foot hanging

Leslie sewing the strips and Jean marking the fusible for the trillium's.

Deb pressed everything perfectly.

I drew petals for the trillium's for Jean to mark on fusible and cut out of batiks,

Leslie manning the machine.

Bed creating the trillium clusters on parchment paper. She loves parchment paper now.

The panels are growing quickly.


It came together as I planned

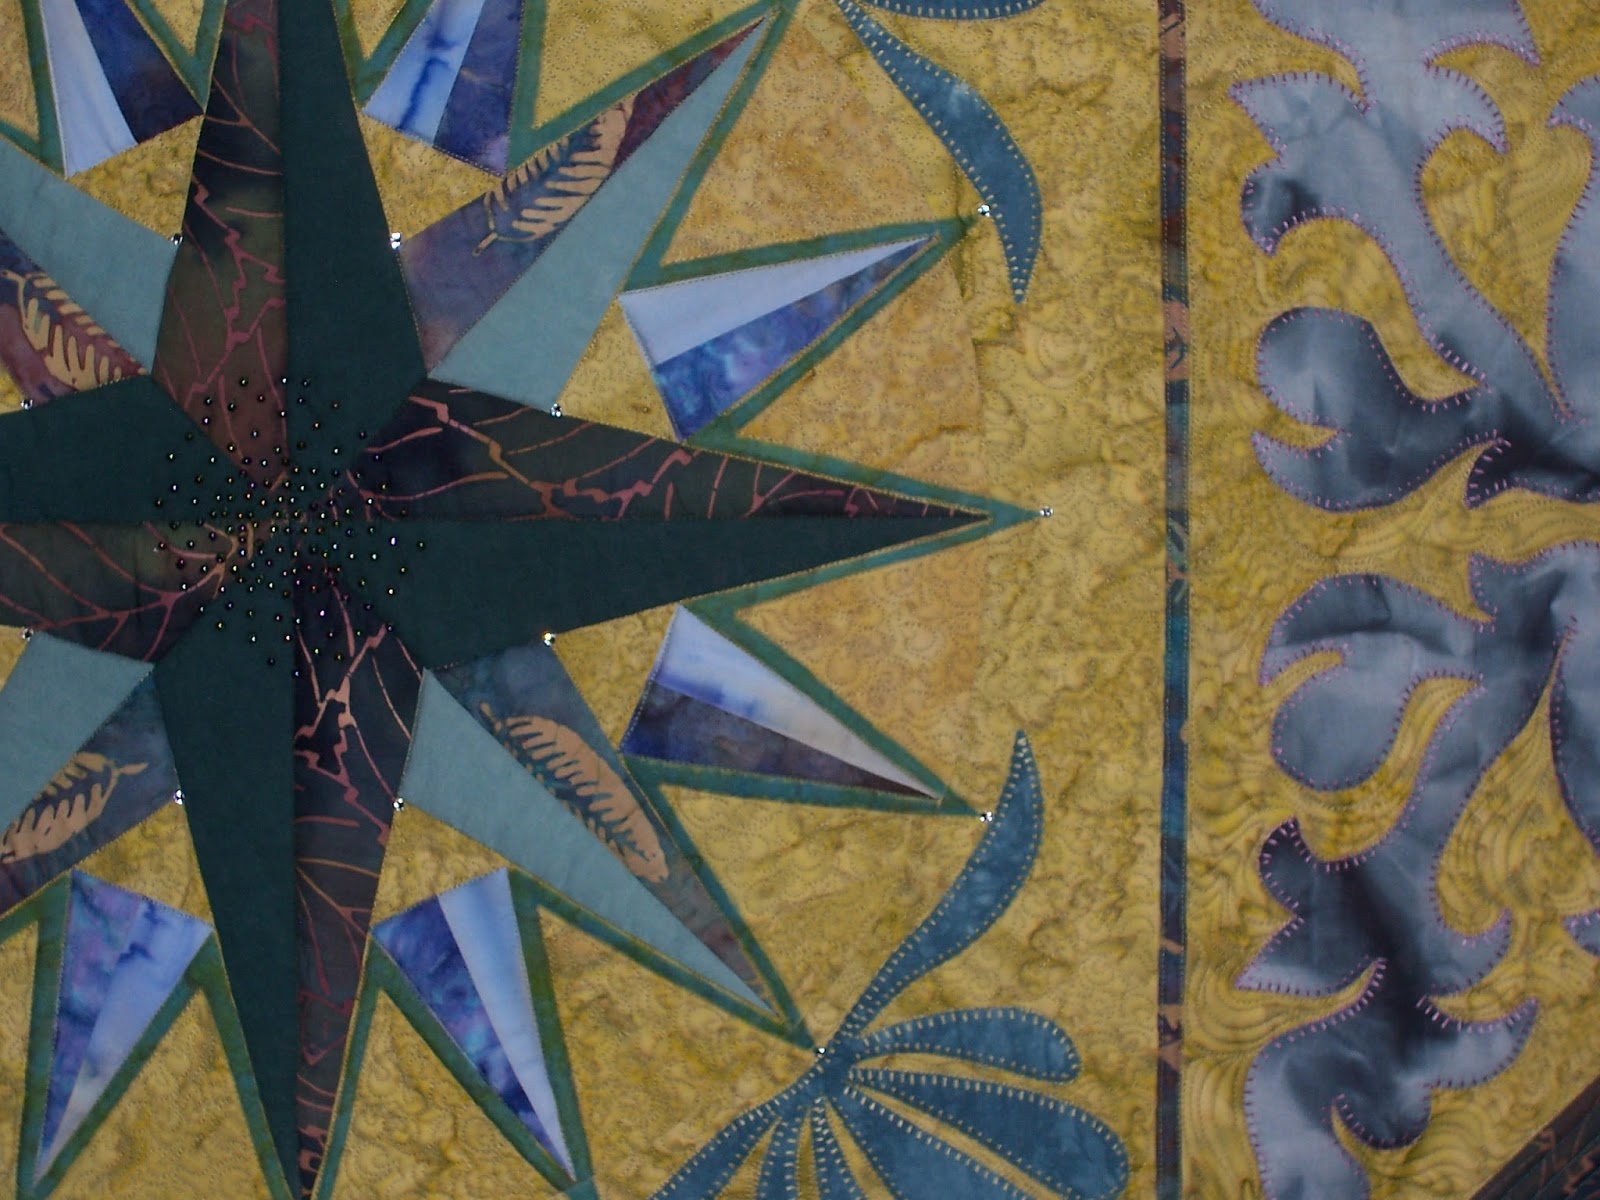
We are happy to say that the Weiss Library permanent exhibit project is ready for the last stages of quilting. Leslie, Jean, Deb and I worked for another 3 1/2 hours to finish the two panels. These are birch trees and trillium's at night and there will be some dragonflies on the upper right hand corner that I plan to make with bobbin work. This is a beautiful collaboration and we are hoping for a dedication ceremony at the library after our quilt show in July. 

Now my next job is to quilt these before the show and have it on display for the Hayward Piecemakers Quilt Show the last weekend in July. I've also made a smaller version that needs to be finished for the quilt show auction. 

The two panels will total 120 inches and will be finished as 2 five foot quilts and approximately 28 inches tall. The trillium's will have a little bit of yellow embellishments for the stamens.

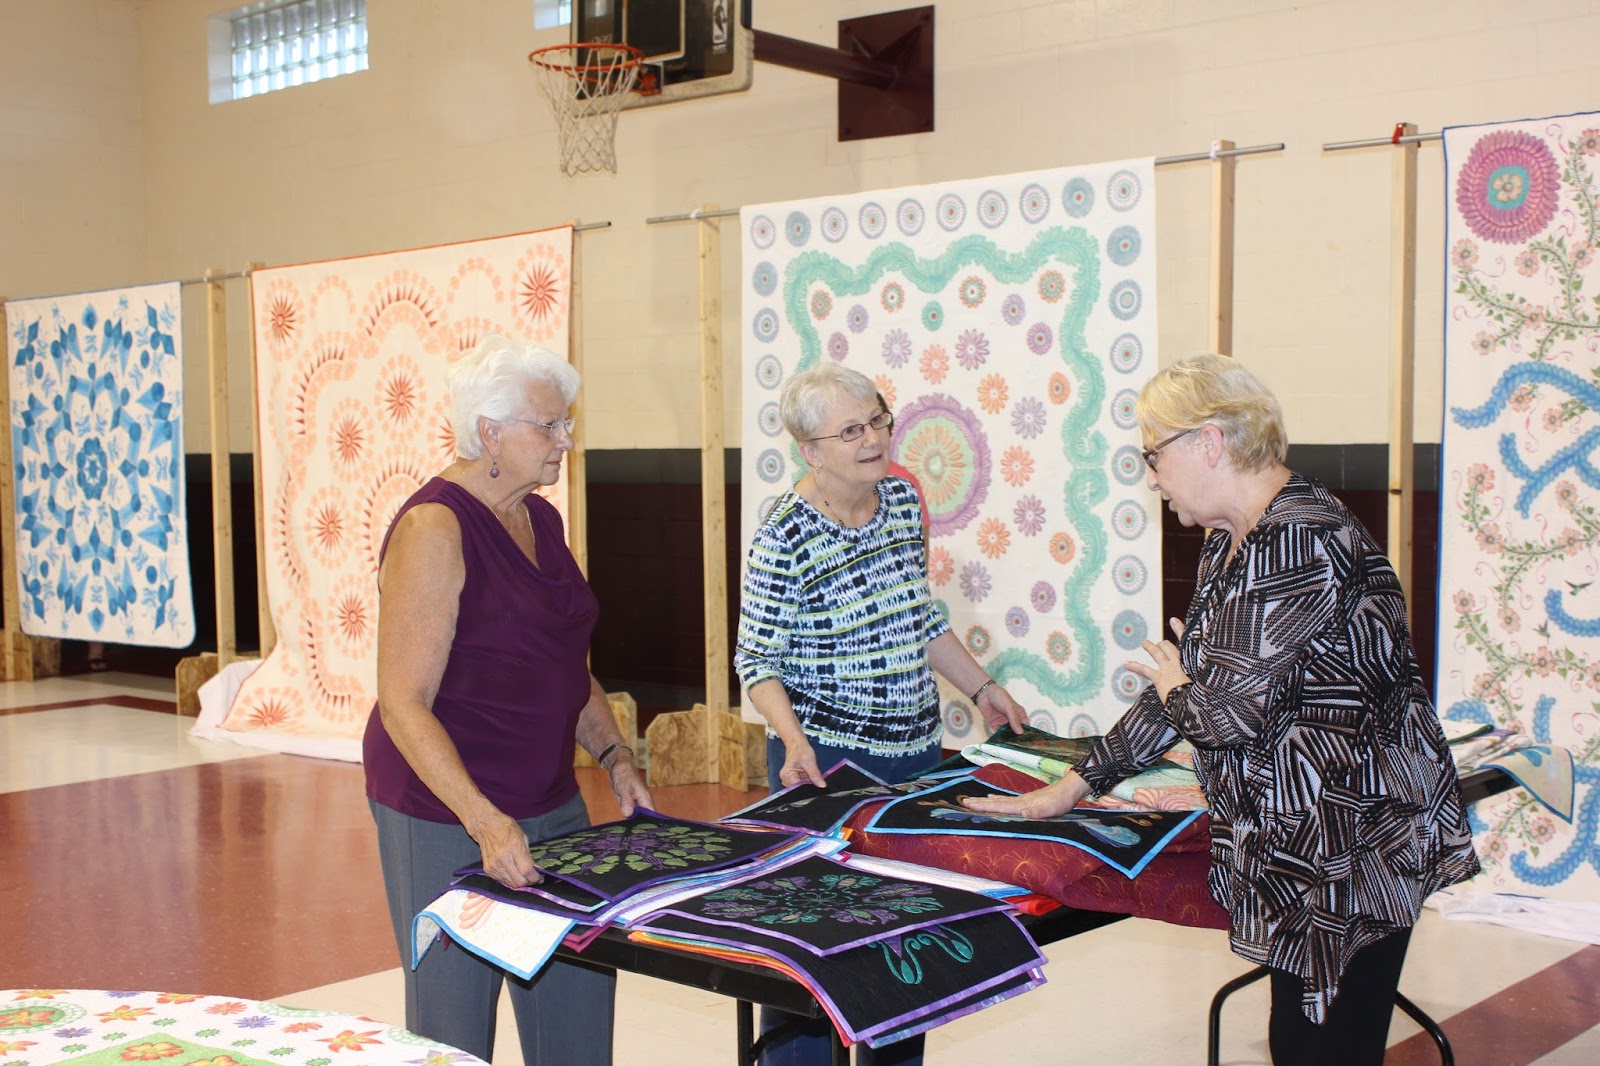
Yes there is no picture of me working. I cut the fabric and prepped for the group. They trusted me and followed my plan perfectly. We make a great team and we still had plenty of time to visit.

Wednesday, May 13, 2015

Hayward Piecemakers Library Exhibit Project


This morning I had three Piecemaker quilting friends over to work on a permanent exhibit for our local library. We chose a northwoods themed project of birch trees, trillium, and dragonflies. After three hours we had strip pieced scrappy fabric sections. Next meeting we will create the 2 tops to span the space we have to work with. The 2 panels will be each 5 feet long and about 28 inches tall. After the friends had left, I cut the birch tree strips for the next round of stitching. By doing this, I had scrap sections that I pieced into a mini of the project that will be quilted and donated for our annual quilt show auction. The mini is about 18 x 22. 

Tuesday, April 28, 2015

A New Cloth


I just finished marking a silk wholecloth that I started in a class taught by Karen McTavish this past weekend. This is my 2nd time to take this class by Karen. The first time was in 2004 and both my skills and Karens skills have grown and changed in 11 years. By retaking this class I've learned to add complexity in both design and execution. 

Another challenge for myself was to use a piece of dupioni silk for the fabric. Dupioni has flaws and small slubs, but with it's imperfection lays it's charm. It is a rich cream that was easy to mark, but doesn't photograph well. Silk refracts light so easily that no matter the different lighting I've tried, I can't get a clean clear picture. After it's quilted I should be able to get a better photo with subtle side lighting to create more shadows.

Karen is a very talented quilter and teacher and I highly recommend her. She is also opening a new store front in Duluth with 5 machines set up to teach on and for you to rent to sew your own quilts. Check her out.

http://mctavishquilting.com/


Friday, April 17, 2015

Nominate me please

National Quilters Circle Blogger Awards - Nominate Me badge
Please click on the link and nominate me.

Of course it would be super cool if you read some of my blog posts too.

Wednesday, March 18, 2015

Crunchy Taggies Baby Toy


A friend shared this method to make a baby taggie toy. I've chosen some fun childrens prints, piece of thin cotton batting, decorative ribbons, and a crunchy chip bag that has been washed. They are layered and stitched to contain the bag and batting by pillow casing them. Leave an unstitched spot on the side to turn right side out. Edge stitch the opening closed and continue around the entire item to make it lay flat. 

Next, test it out on a baby.